Happy Easter everyone! Today, I thought I would share a fun project I did for Doodlebug not to long ago. It is all sorts of Easter cuteness- and a tutorial!

Easter is certainly not all about candy, but I do have to admit that I get a little excited to have those yummy chocolate eggs around again. And just like my weakness for chocolate eggs, I also have a weakness for containers to hold them! So when I got my hands on Doodlebug‘s new Easter Express collection, I knew there were chocolate eggs…I mean…treat containers in my future!

I really love the little milk cartons that have become a huge trend in treat containers. In fact, I love them so much that I made a few for Valentine’s day! Having said that, I don’t like the fact that I need a full sheet of 12×12 cardstock to make each – paper hoarders like me will understand! So I set out to see if I could modify my design to use less paper without loosing too much in size. The result was these cute cartons with lids!

So, are you convinced that you need to have a few treat containers in your life too…even if it is to have an excuse to grab some chocolate eggs a little earlier than necessary? Well, grab your paper, glue and scissors and I will talk you through my experiment!

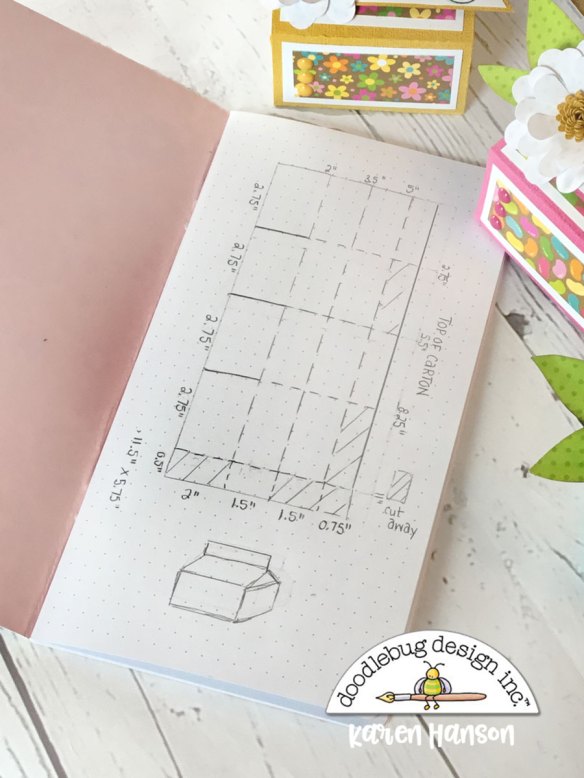
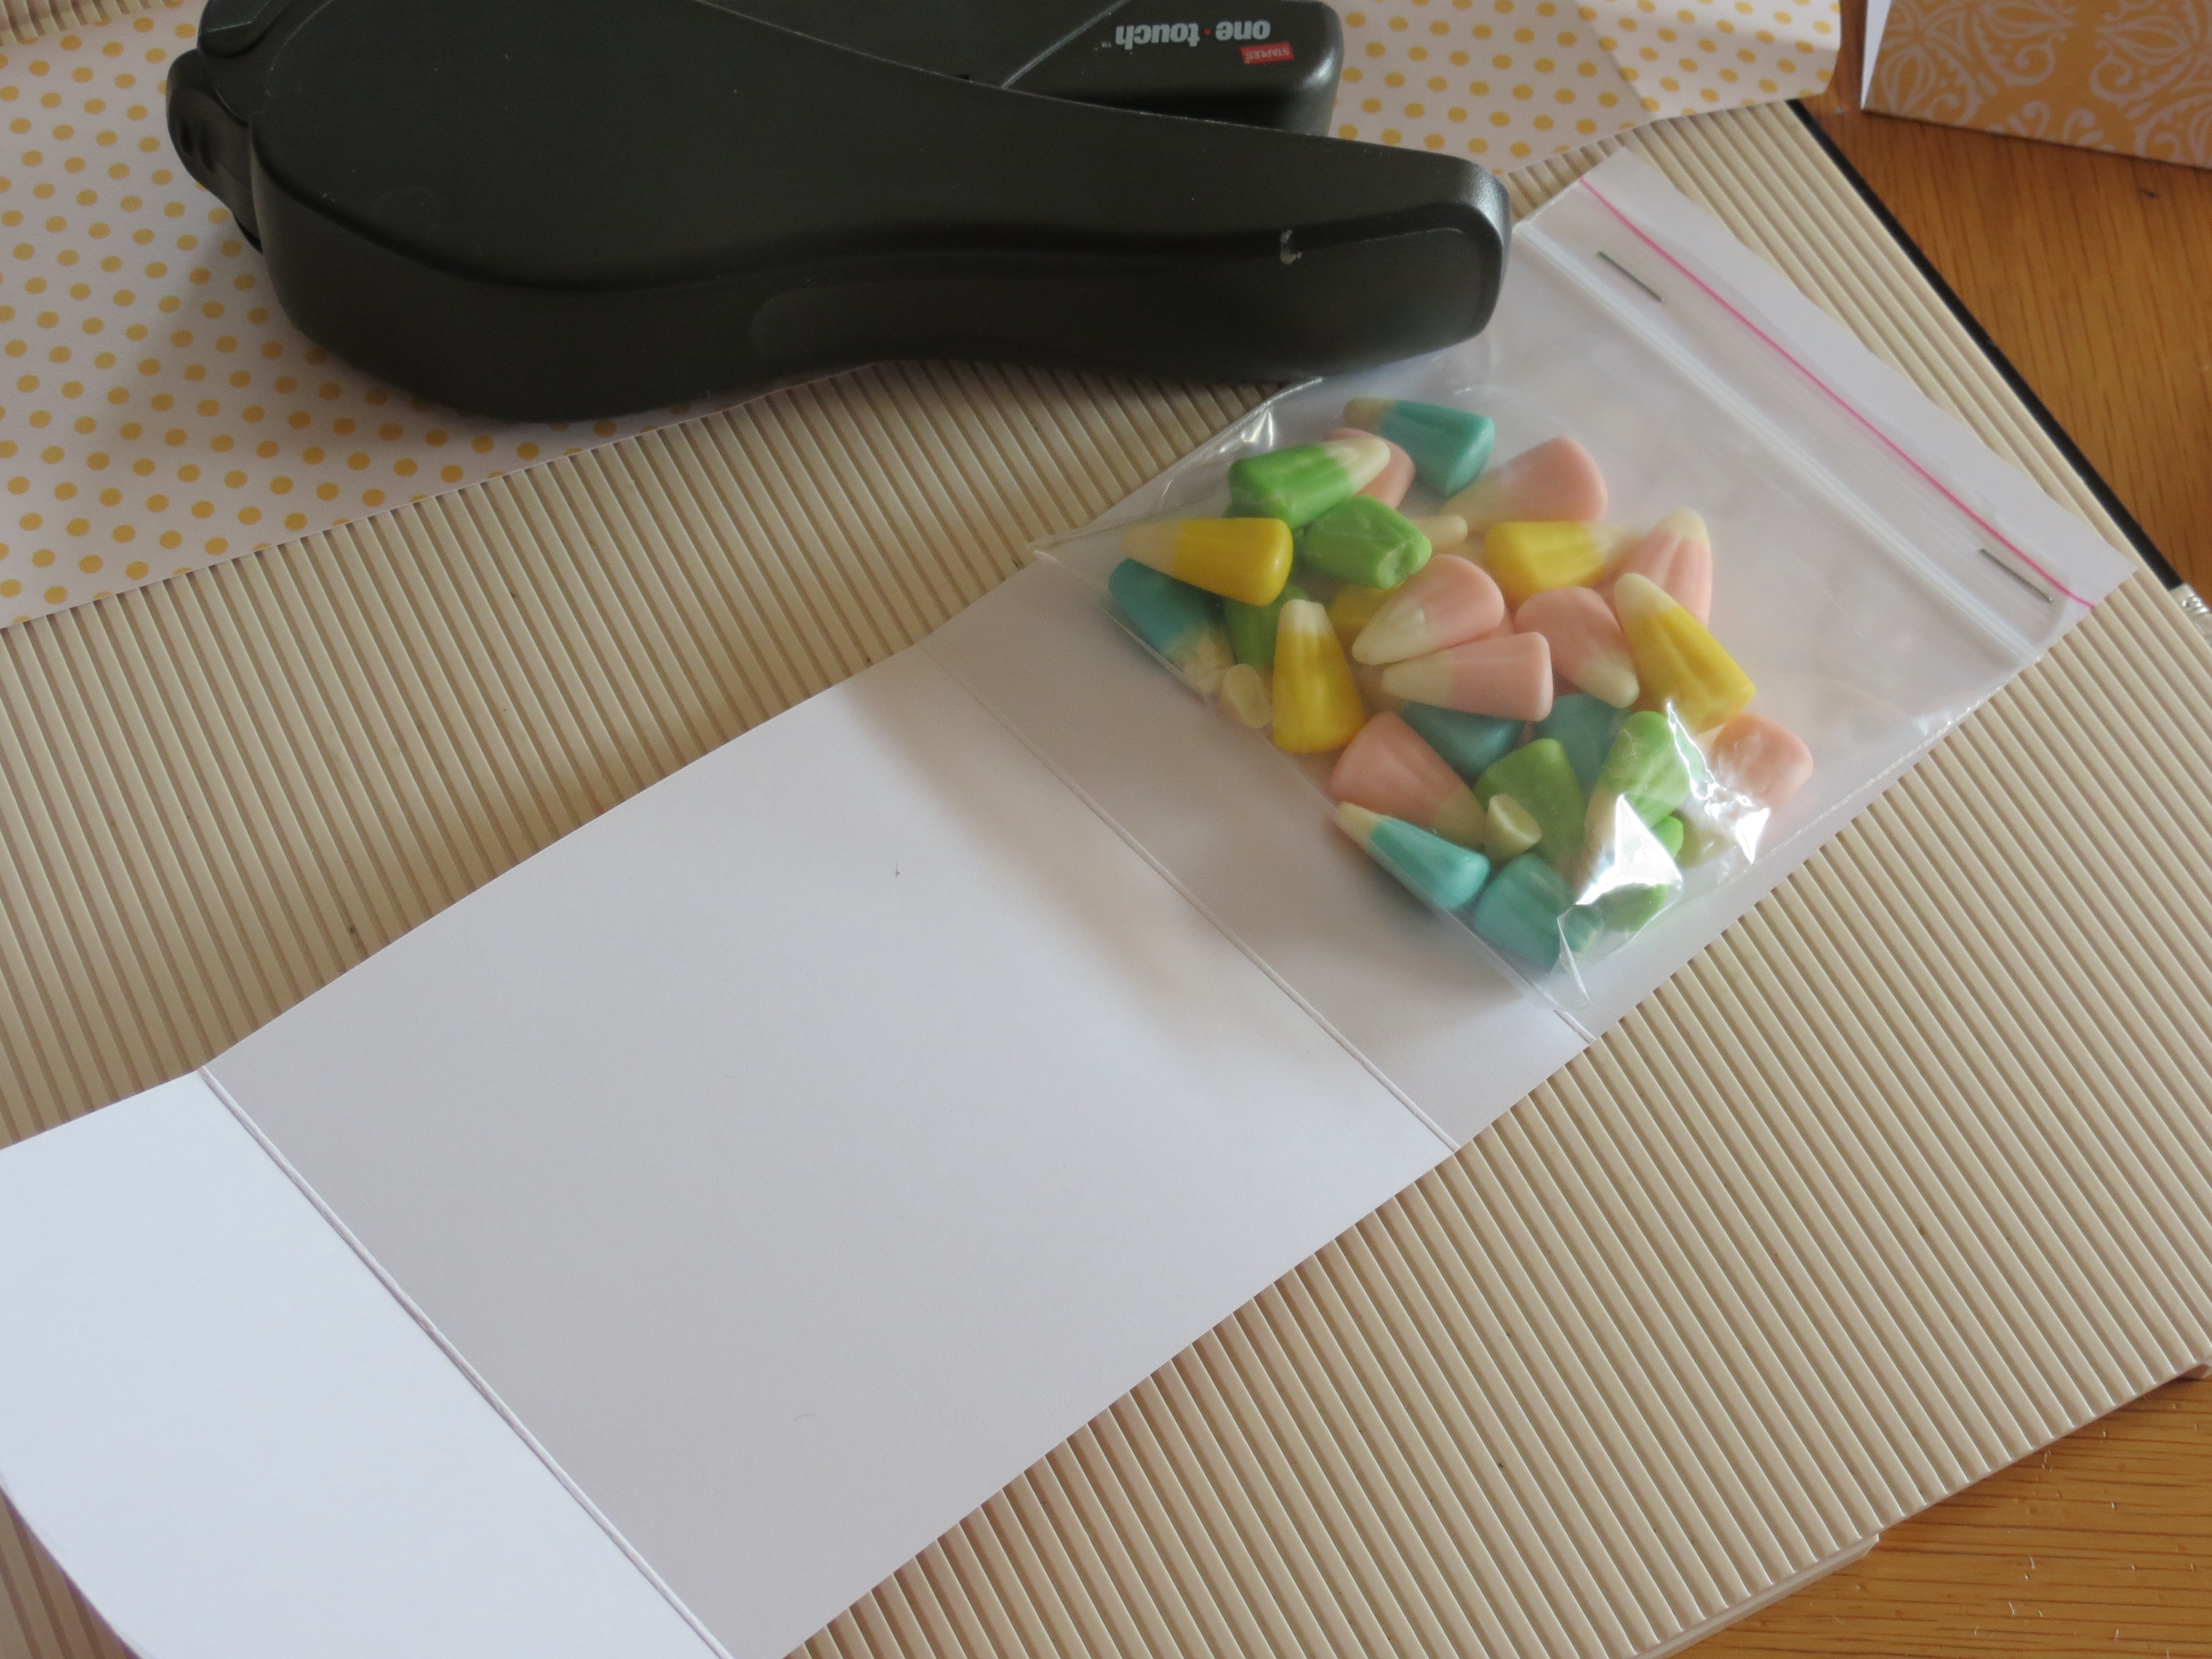
- Start by cutting three pieces of paper:
- for the base – 6″ x 6″
- for the trim on the base – 1″ x 8 1/2″
- for the lid – 2 3/4″ X 9″

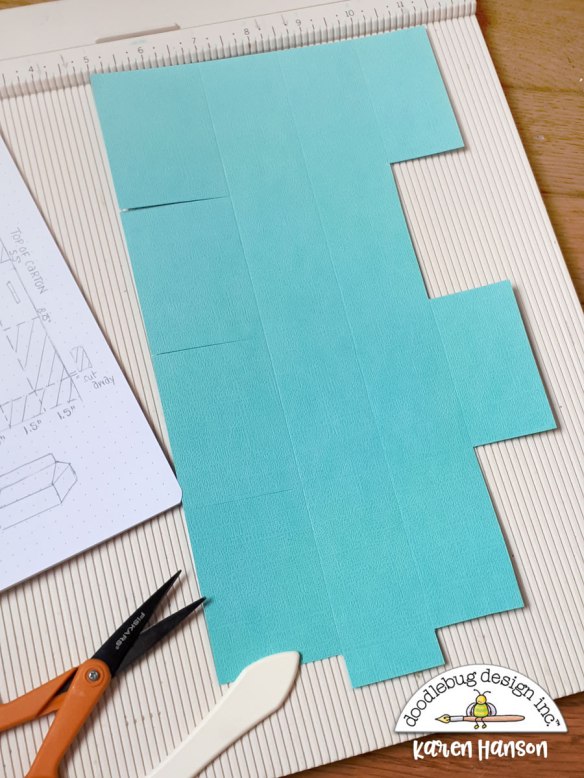
2. Using the piece for the base, score at the 2″ and 4″ mark.

3. Turn your paper 90 degrees and score again at the 2″ and 4″ marks.

4. Using a pair of scissors, cut up along the 4″ score mark on each side, stopping at the first score line you hit. Put this piece aside for a moment.

5. Using your 1″ x 8 1/2″ piece, place the long edge at the top of your scoring board and score at the 2″, 4″ 6″ and 8″ points.

6. Flip over this piece and run 1/4″ adhesive along the bottom edge of the long edge (if the pattern of the paper does not have a “right side up” like mine did, it doesn’t matter which of the two long edges you run the adhesive). Put this piece aside for a moment.

7. You are now going to assemble the base and the trim. Grab your base piece and fold in one of the 2″ tabs you created by cutting with your scissors. Run adhesive along the top and bottom edge of this tab. Now pull this side up, and glue it to the tab directly to the left (the one that was originally beside it). This will create two side walls for your base)

8. Apply your trim to this side of your box 1/4″ down (right where your adhesive is already run). You should have 3/4″ of the trim sticking up and 1/4″ of it adhered to the base. Continue step 7 and 8 all the way around your box, folding in one side at at time, applying adhesive, gluing it to the side beside it and the applying the trim. Tuck the overlapping piece on the INSIDE of the box.
Note: you may need to adjust the fold on the trim as you go around the outside edge – go for it! You have enough of an overlap at the end to create a perfect fit!


9. You are now ready to assemble the lid. Take your remaining piece of paper and align the long edge across the top of your scoring board. Score at the 2 1/8″, 4 1/4″, 6 3/8″ and 8 1/2″ points (every 2 1/8″).

10. Turn your paper 90 degrees and score at the 1″ and 2 1/4″ marks.

11. Run adhesive along the front side of the short 1/2″ tab that you have created.

12. Fold each of your score lines and use the adhesive tab to shape your lid into a square tube. You will need to tuck the tab under to to hide the seam.

13. Using a liquid, fast drying glue, run adhesive on the inside edge all around the top of your lid. Pinch two opposite sides in and hold in place for a couple of minutes to ensure that the top of the lid stays together. If it pops open, just pinch it again and hold longer.

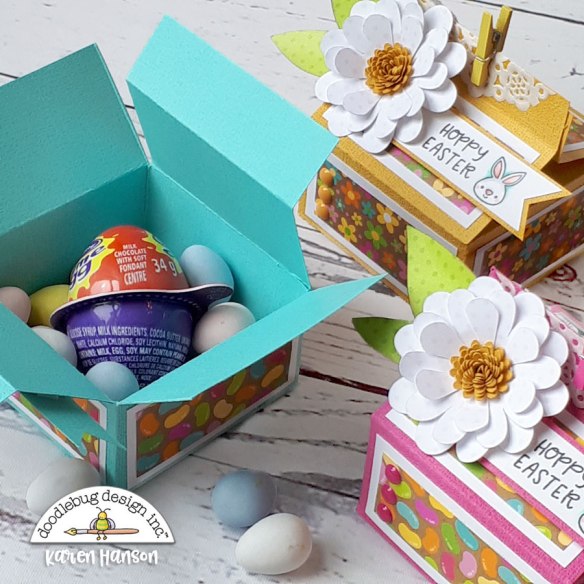
14. Once the lid is completely dry place it on top of your base and check the fit.
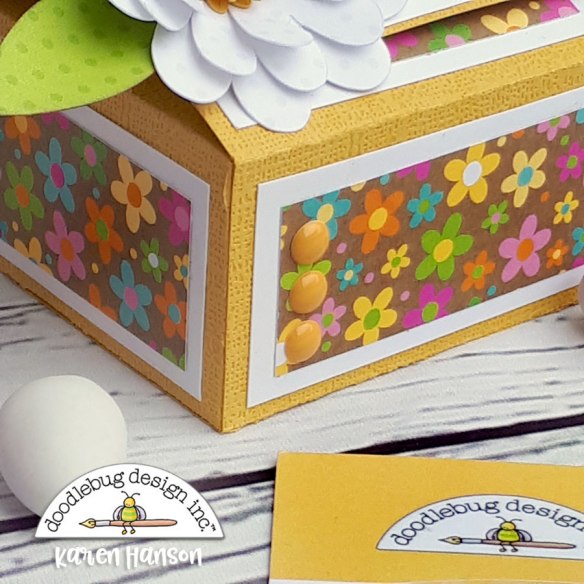
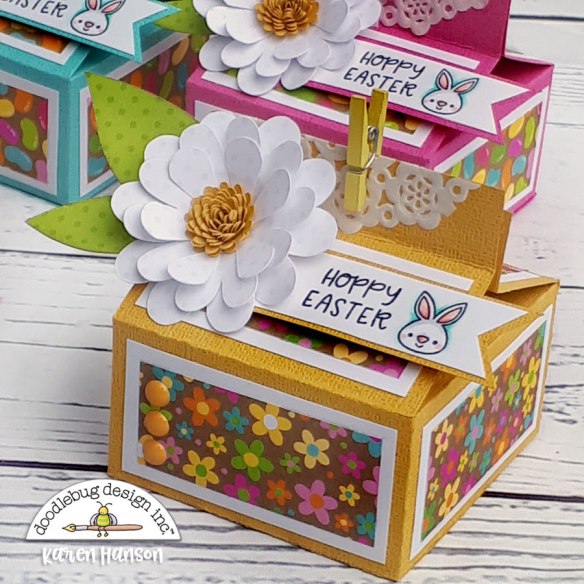
 15. Your treat container is now ready to embellish!

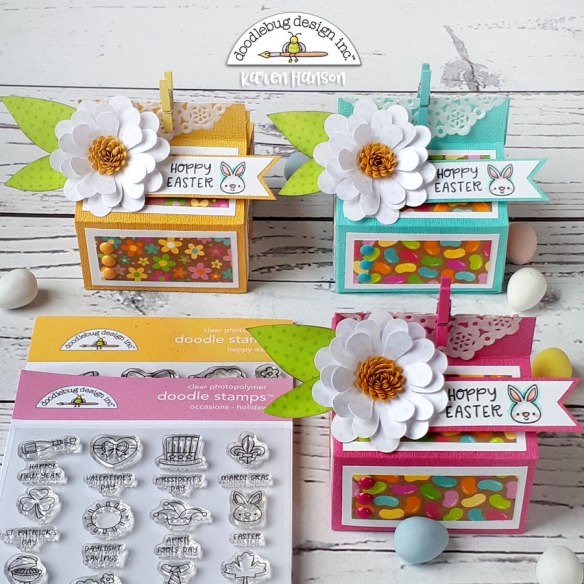
Give some of the new mini icon stickers a try – they are a perfect fit for these tags topped off with mini clips, some Doodletwine and the awesome new matte Sprinkles! Oh yeah!

And then, well…will them up! Or if you are anything like me…eat the little treats that you were going to fill them up with and try again a little closer to Easter! Maybe I’ll have to buy a bigger bag of them next time.

So there you have it – the paper hoarding, chocolate loving version of the mini milk carton! I hope you love them as much as I do. Thanks for stopping by!
Hugs,
Karen