Happy Easter!

Every Easter, I find myself on a crafty mission to create treat containers.  And even if we are stuck inside and cannot meet with friends and family, I say that it is still a GREAT TIME to enjoy treats!

So if you are feeling crafty today, here’s little container that you can make to add a little festivities to…well, your festivities!  I thought I would share the sketch I created for these easy milk carton-inspired boxes using a piece of textured cardstock cut to 11.5″ x 5.75″(you can get 2 out of every 12 x12 sheet).

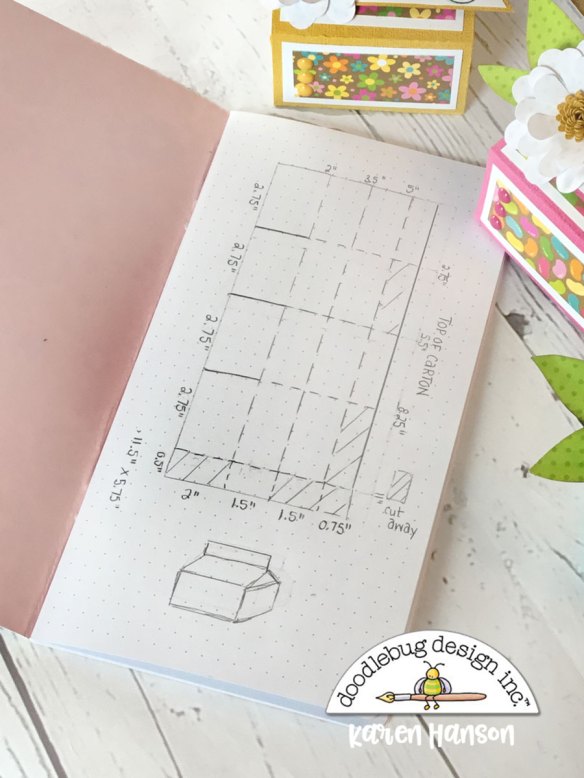
One you do all your cutting and scoring, it will look like this:

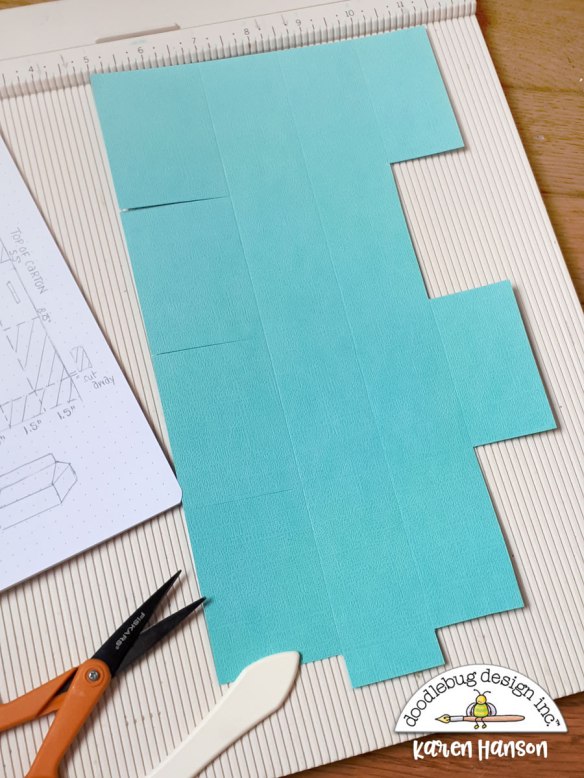
Note: when I created these initially, the top part of my carton was wider than I decided to keep it so the top flap in this picture are wider than your will be.  Follow the sketch as your guide for the measurement.  

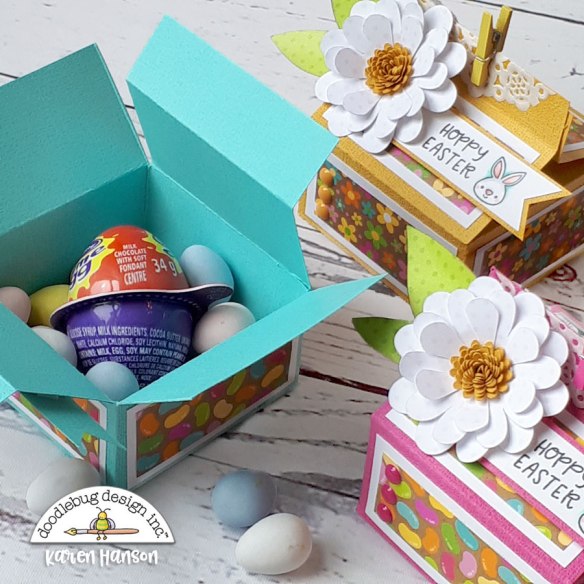
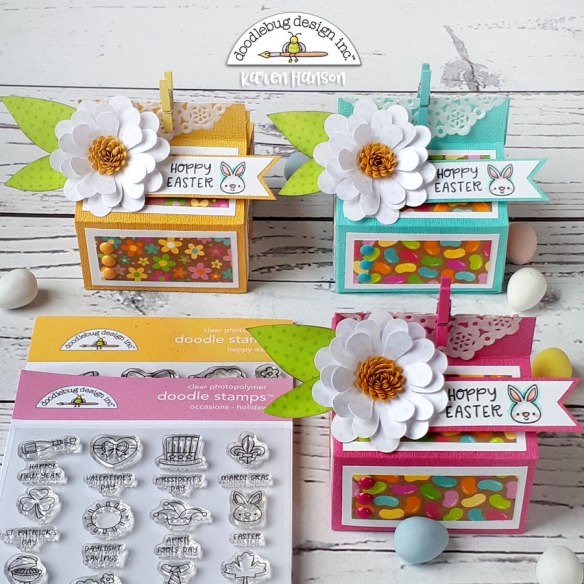
I love the size of these because they are big enough to hold my favourite chocolate egg treats as well as some of the mini ones too!

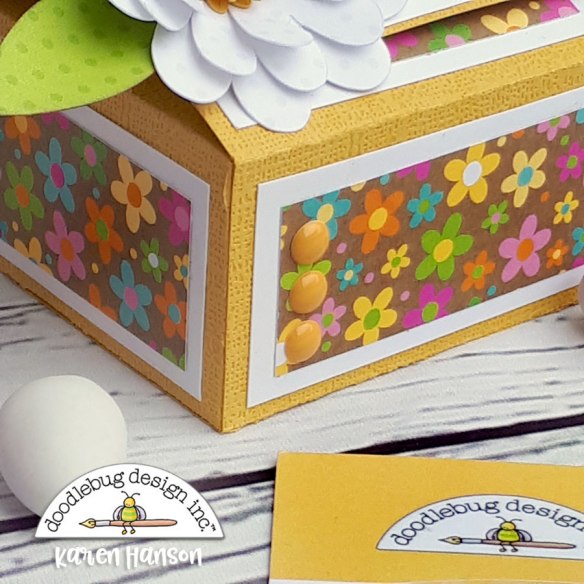
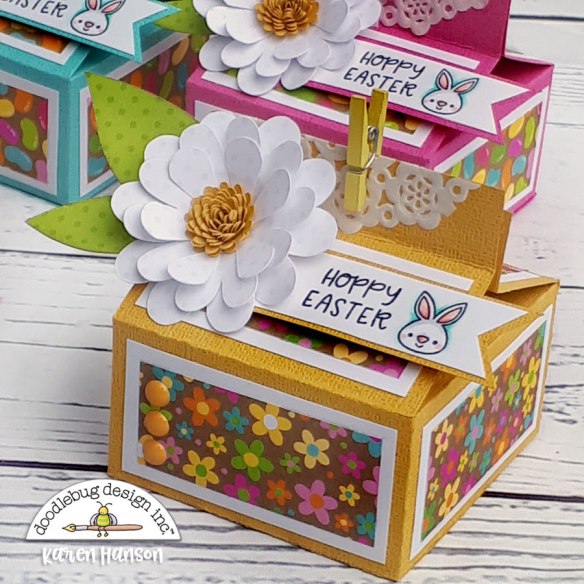
I embellished them with the Easter Parade paper from Doodlebug matted on white paper and then topped them off with some Doodlebug Sprinkles.

The tops were trimmed with a flower I created with Petite Prints , a mini doily and mini clothes pin.  I then grabbed my Hoppy Easter stamp set for a sentiment and my new set Occasions – Holidays for the sweet little bunny and these were all done!

And while these would make a great addition to an Easter hunt, I think they would also be great as favours on your Easter table.  Or perhaps send a few off to those you love because it certainly true that we could all use a little chocolate and Doodlebug sunshine right now, don’t you agree?

Look, if you are anything like me, you don’t need an excuse to indulge every once and awhile!  But a little work of advice – buy the big bag of chocolately treats to fill up these beauties when you make them because you deserve a treat too!

Thanks for stopping by!

Doodlebug Booville Post-it holders

Hi everyone!  Happy Halloween!  I know that it isn’t a holiday for everyone…but even if the scary part isn’t for you (I’m with you on that part), there is plenty of cute Halloween fun to be had!   So today, I have a little fun to share featuring Doodlebug’s  Booville  collection!

These little post-it note holders are one of my favourite projects here on the blog.  I think they make perfect little gifts that are a little more useful than a card (although you know I love cards too).

And if you are interested in finding out just how make these, come on over to the Doodlebug blog for a full tutorial!  

Whether you are handing out candy, heading out with the kiddos, or hiding in your house with the lights off, have a spooktacular day!

Thanks for stopping by!
Karen

Doodlebug Washi Tape project

Good morning!  The countdown is on!  Only one day left until Halloween, and only one day left until you can break into all the Halloween treats (hahahaha – yeah, right…that happened weeks ago).  I wanted to share a quick project with you today featuring washi tape from the super cute Doodlebug collection called Booville…

…these cute little cookie treat bags!  The best part (besides how simple these were to pull together) is a new use I found for washi tape – twist ties!

That’s right – you are not going to believe how easy these are to make, and how truly perfect washi tape is for this purpose!  So come on over to the Doodlebug blog to see how I pulled them together.

Oh, and if you have a pre-treat or two today, don’t worry – your secret is safe with me!

Thanks for stopping by!  Hugs,
Karen

Doodlebug Coffee Cup gift card slider

Hi everyone!  I have to share a secret – I am obsessed with interactive cards (okay, it is not really a secret and if you have spent any time here at SCS, you will know that this is the truth)!  I love adding little elements that “surprise” my recipient…

double-closed

…like a cute little coffee cup that has a lid that comes off to reveal a gift card.  Oh yeah!

When I found out that Doodlebug was releasing a set of cut files to coordinate with the adorable Cream & Sugar collection (available at LoriWhitlock.com for Cricut users and at the Silhouette Design store) I immediately knew what had to be done (well, after I stopped squealing anyway).  So I set out to find a way to make that lid come off…

double-open

…and I am happy to share the secret with you too!  That’s right – a tutorial!  So go cut one or two (or 100) of these cute coffee cup cut files and follow along!  You’ll be amazed at how easy it is!

tutorial-1

Using your cutting machine, cut your file at at least 3.5″X 5″.  I used this size for two reasons –  to fit the gift card while also being able to adhere it onto an A2 card base for easy mailing.  You can definitely go larger, but a smaller size will not fit the gift card. I used a variety of papers from both the Cream & Sugar collection as well as the Petite Prints.  Have fun mixing and matching and playing with colour!

Note: I ended up creating an extra cut of the lip for the lid (see the grey piece above).  This isn’t really necessary, but because the lip ends up being raised, I liked having the matching print on the bottom as well.

tutorial-21.  Piece together all of the elements except for the bottom layer (which also forms your lid).  I played around with the placement of the heart and the arms on my coffee cup characters, and even embellished them with the This and That stickers from the Cream & Sugar collection.  Oh, and I couldn’t help but add a few Sprinkles onto the cheeks as well – the cut file has them, but I am a firm believer that every Doodlebug project deserves a Sprinkle or two! 

2.  Using a pair of scissors, cut the base piece into two, just below the lip of the “lid”.
tutorial-3

3. Run a small amount of low stick dry adhesive along the middle bottom edge of the “lid” (you want the recipient to be able to remove the card without ripping apart the lid).  Place the gift card on top of the adhesive.  tutorial-4

4. using some dimensional adhesive, add two pieces on either side of the gift card.
tutorial-5

5. Place the extra copy of the lid lip onto the adhesive.  The “slider” component is now complete.

tutorial-66. To create your pocket, run a small amount of liquid adhesive around the outside sides and bottom edge of the base for your cup (this is the piece that you cut away from the lid). You can run some dry adhesive instead, but make sure it is not wider than 1/8″. Be sure not to run any adhesive across the top!
tutorial-7

7. Take the  assembled part of your cut file and place it on top of the backing with the adhesive.  You have now created a pocket that the gift card can slide into!

tutorial-8

8. Test out your fit, and fun adding even more embellishments…

twine…like some adorable Doodle twine…

tea…or even some more Sprinkles (Bumblebee Glitter were a perfect fit here)!
stagedAnd then, find a way to part with these cuties if you can.  These are going to make their way onto the desks of my daughters’ two amazing teachers this Valentine’s day.  Who will you lucky recipients be?

Thanks for stopping by, and I hope this project and tutorial made you smile!

Hugs,
Karen