Favourite Halloween movie anyone?!

kimmie-frontOne of the things I remember most about Halloween as a kids was the Charlie Brown Halloween special about the Great Pumpkin that would show up on tv the Monday before Halloween.  There was something about Linus’s faith in the Great Pumpkin that I always thought was quite something – especially in the face of all the doubters!

kimmie-closeup
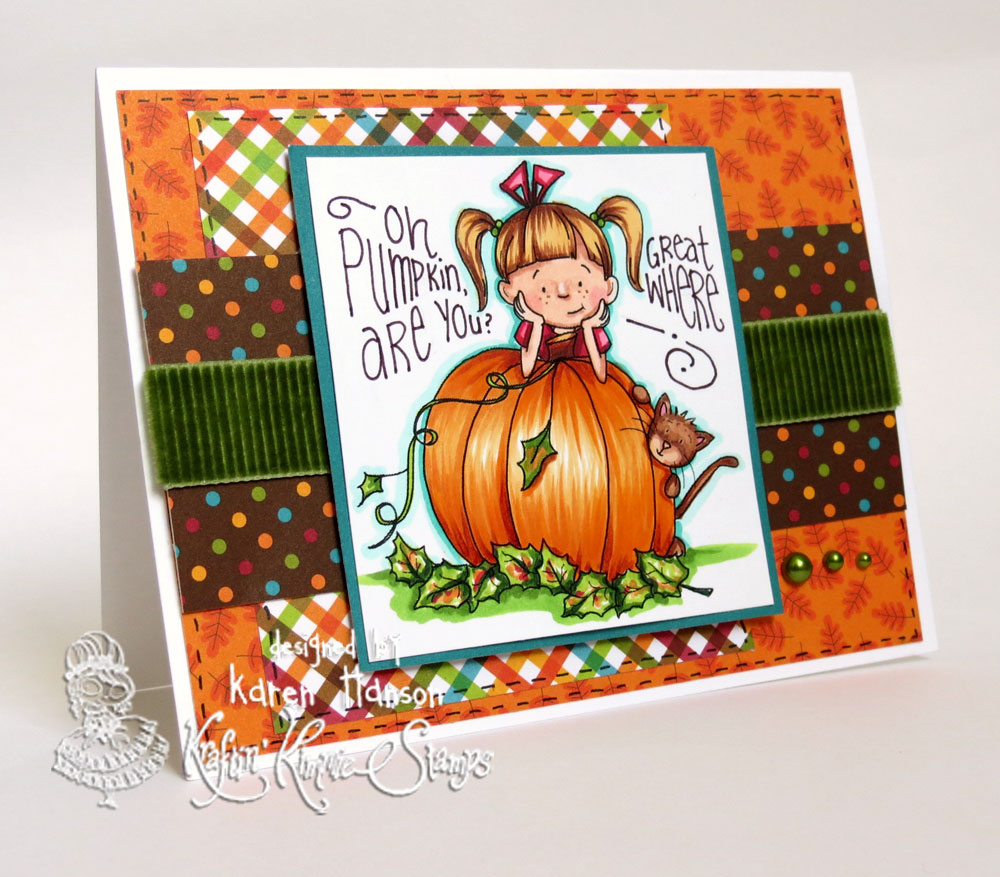
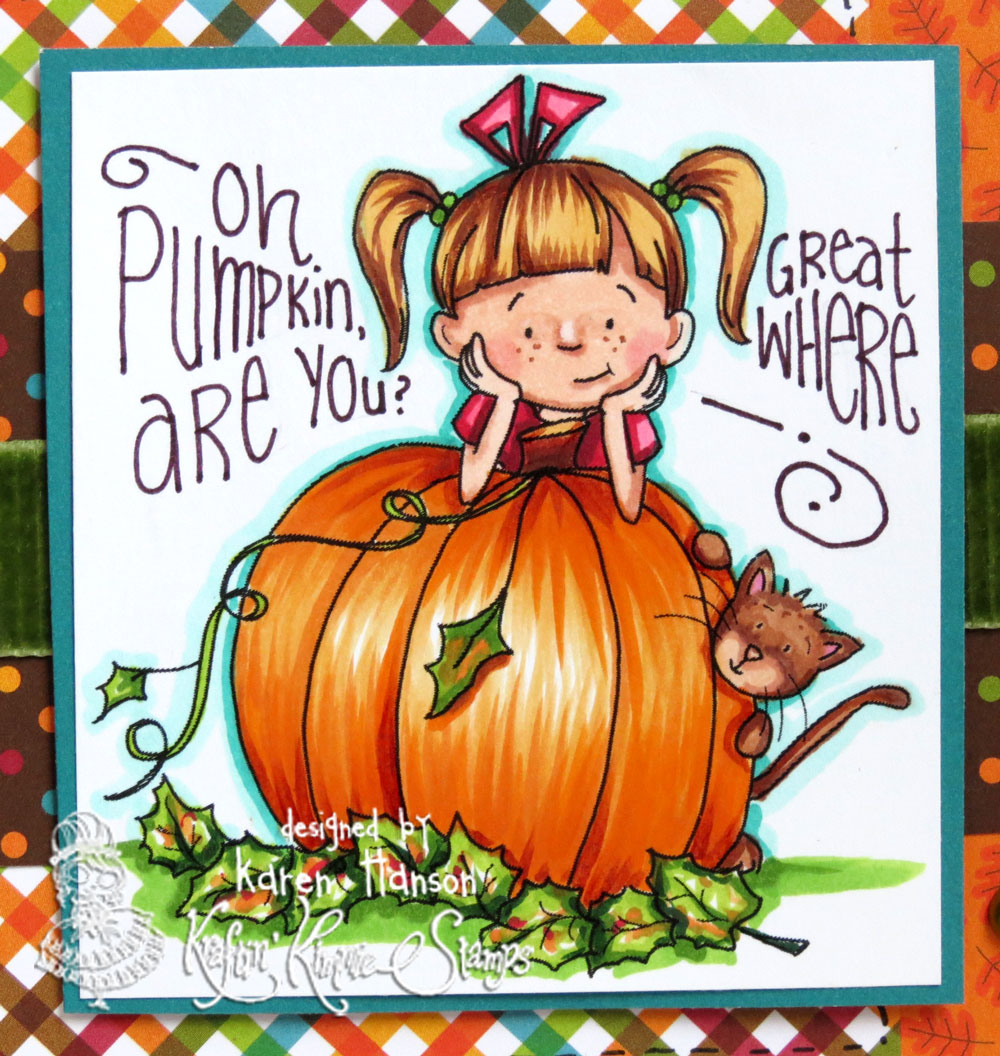
So, when I first saw this cute stamp from Kraftin’ Kimmie’s “Hey There Punkin'” set, I couldn’t help but think about that movie.  And Lulu, perched behind that pumpkin looks just like she is pondering the great mysteries of the Great Pumpkin this Halloween!

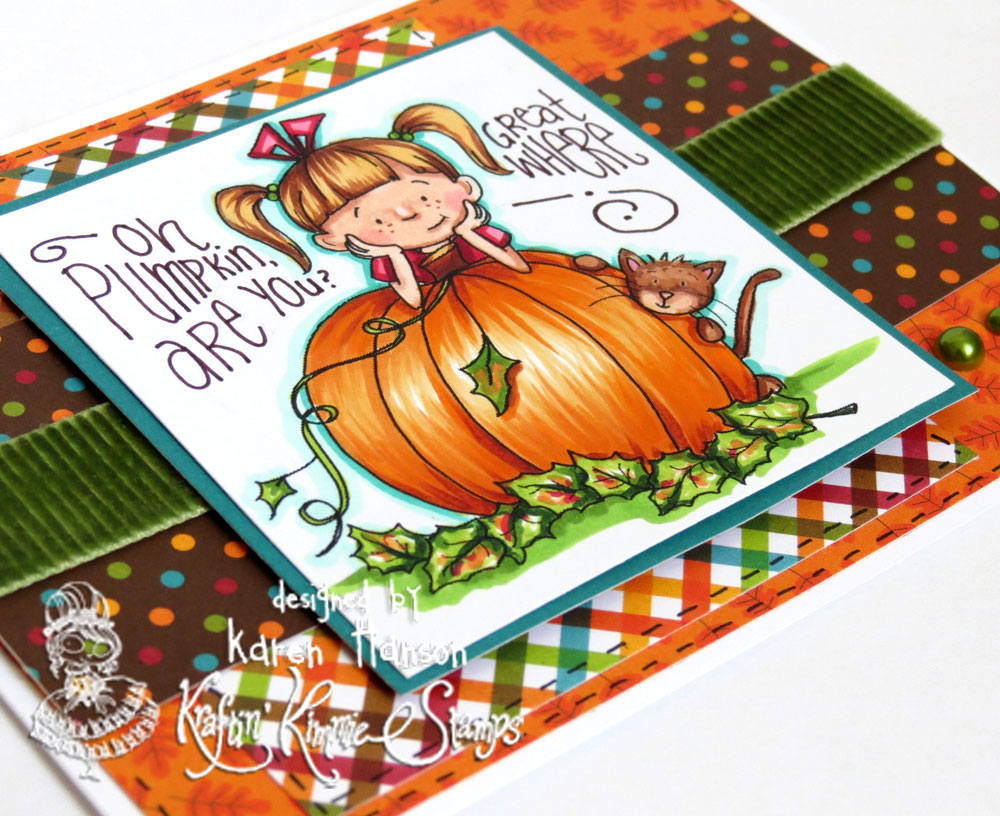
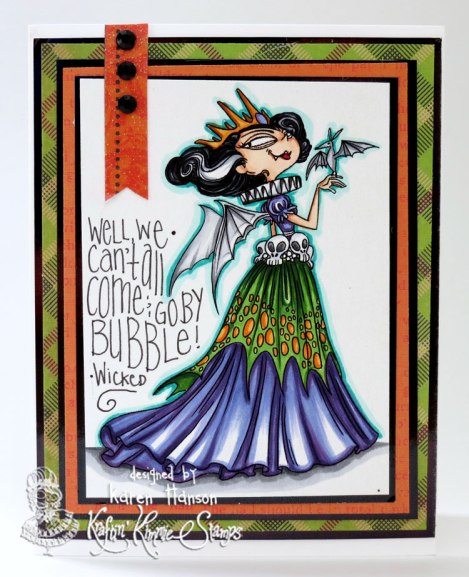
Lulu was coloured up with Copics, and I picked colours to match the cute Doodlebug paper.  For a bit of texture, I also threw some corduroy ribbon on the card from May Arts – somehow corduroy scream fall to me!  The sentiment was hand lettered – a quote from the Great Pumpkin of course!

Well, since it is Wednesday, it is challenge time at Kraftin’ Kimmie Stamps.  We want EVERYONE to be able to play along so your submission can use ANY stamp and can be any theme, any style, any design and it can be a card, a scrapbook page, an altered item….you name it!! It must be a NEW creation and you can enter over on the Kraftin’ Kimmie blog until November 4th at midnight! At the end of the month one random winner will be chosen from all the submissions for the whole month and will receive a $20 Gift Card to the shop!

2 and a half more days until Halloween!  Thanks for stopping by!

kimmie-angled

Dream big

Happy Saturday everyone!  It’s challenge time at Kraftin’ Kimmie Stamps, and this week the hostess is Stephanie.  Her challenge this week is to incorporate this new sketch into your design, so get your stamps and paper out, and get crafty!
Sketches are a lot of fun because they take some of the pressure out of crafting.  And whether only some or all of the elements work for you, sketches give you a great place to start!
For my inspiration card, I decided to work with a stamp from the “Dream Big” set, and paired it up with some paper from Authnetique’s Harmony collection.
I added a bit of eyelet ribbon from May Arts just to soften up the lines a bit too!
Now it’s your turn!  Create a card, scrapbook page or altered item with a Kraftin’ Kimmie Stamp or any other stamp using this sketch as a starting point.
Oh, and Kimmie has put a dozen of her  fave stamp sets on SALE this weekend in our FRUGAL FRIDAY SPECIALS at 25-50% OFF so be sure to check them out!

Thanks for stopping by!

September-27-angled

Happy kraftin’!!

Vampire Queen

Aug 15 fullIt’s VAMPIRE QUEEN time today at Kraftin’ Kimmie Stamps, and if you are a fan of Halloween, this release is for you!   Each set comes with the fabulous queen (either the vampire queen like I have used, or the awesome dragon queen) image stamp, plus THREE coordinating sentiments PLUS an accessory stamp!! They’re spook-tacular!

Aug 15 closeupI coloured up this beauty with Copics to match some DCWV paper I had from last year!  I love all the amazing details on this image – from all the fun pleats to the skulls to the cute bat!  It really is a blast to colour!

Below you will find all the Krafty Girls & Guests who have goodies to show you today and while you’re visiting their blogs, be sure to leave some love at each stop because one lucky stamper is going to WIN some $$ to the Kraftin’ Kimmie Stamps Shop!!

ALL of the AUGUST stamps will be available on Saturday night at the Kraftin’ Kimmie Stamps Shop! Be sure to join us for an hour of celebrating the new stamp sets, fun and prizes at our LIVE ONLINE RELEASE PARTY! Come hang out with the Krafty Girls, Guests and Kimmie!

Happy hoppin’!!

Aug 15 angled

Handwritten Sentiment tutorial

Welcome to Monday!  Today, it’s my turn to create a little tutorial for Kraftin Kimmie Stamps and this is fun one!
Recently, I have received a lot of questions about how I create my handmade sentiments, so I thought I would try to break down the process for you.  Having said that – there is no precise science to it, so practice will be your best friend!
Sentiment-1
Materials:
  • a stamped image of your choice – I am using one of the cute kitties from Feline Great
  • pencil
  • eraser
  • thin marker – I am using a Sakura 0.25 point in black
Note before you begin – For the purpose of this tutorial, I am creating my sentiment BEFORE I colour up my image.  Sometimes, I will make a mistake with the ink, or simply will end up with a shape that doesn’t work when I finish the sentiment.  By creating the sentiment at the start of the colouring process, I just have to re-stamp the image and try again instead of having to re-colour or fussy cut the image if it doesn’t turn out as planned! 😉
Step #1 
Sentiment-2On a scrap piece of paper, determine the sentiment you would like to write.  Try to figure out how many lines it will take so that the characters are evenly spaced.  For instance, you don’t want 3 letters on one line and 10 on another.  It doesn’t have to be a perfect match – just go for balance.
Then create some wavy lines very lightly with a pencil to match the number of lines you need for your sentiment. You do not want your wavy lines to match – have some start by moving up and some by moving downward.  Also think about the important words in your sentiment that you might want to feature.  I had my second line come down to create a larger space for the word “Purrrfect”to fill in to create some emphasis.
Step #2
Sentiment-3Pencil in your text, starting the letters at the bottom of your wavy line and filling in the entire space created by the lines.  I like to mix up my upper and lover case letters for a bit of a playful look, but it’s entirely up to you!  Embellish away!
Step #3
Sentiment-4Check your spacing in relation to your stamped image.  You want the sentiment to fill in the negative space around the stamp, so this is your chance to see how it compliments the space.  You can see that I took my pencil and sketched in a line that was slightly lower for the beginning of the word “Valentine”.  I simply wanted the word to be as far away from his paw as it is from his tail.  This is when you want to be really happy with the way the sentiment looks, so take some time to look at the image from a distance and see what you think.
Step #4
Sentiment-5

Using a fine point marker, go over each of your letters, working slowly to for precise shapes.  A fine tip marker will make a difference – if it is a lot wider than the black outline on your stamp, the sentiment can look really heavy and compete with the stamped image instead of working with it.
Step #5   
Sentiment-6Wait for at least 3-4 minutes (yes – time yourself), and then carefully erase the pencil lines.  Do not rush this step – it is totally frustrating to smudge the lines and have to start over, so you really want to give the pen a chance to dry.  My Sakura marker dries very quickly (by the time I get to the end of the sentiment, the start is usually dry), but I still wait the full 3-4 minutes just in case.  It’s a good habit to get into especially if you plan on using different markers.
Oh, and a little tip for erasing – always erase in one direction only, starting in the middle of your piece of paper and working out towards the edges.  This will ensure you don’t get that frustrating eraser crinkle that happens  hen you catch the edge of your paper with the eraser and it buckles in towards to you! Remember, if you get a smudge or a crinkle you can always re-stamp the image and start again (you already have a template for the sentiment), or simply fussy cut the image and start fresh!
Thanks for stopping by!