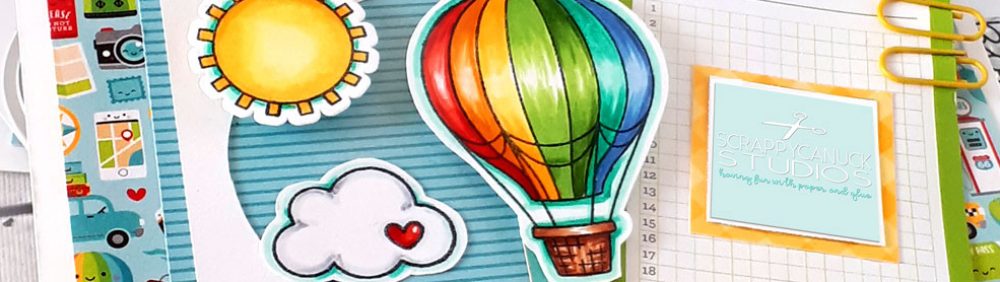

This version, made for my nine year old nephew was created with Echo Park Dots and Stripes. This one was never ending, not just in design, but also in production - I thought I was never going to get all those "studs" glued on! 🙂
This time of year is filled with birthdays in my family – especially March! So I have been making cards like crazy and thought I would share one of my favourite new interactive cards with you – the never ending card! The neat thing about this card is that there are actually four faces, and each time you fold one backward, and new one emerges until you are right back where you began.
In the version that I made this weekend for my nine-year-old nephew, I tried to use the Dots and Stripes line from Echo Park to create the look of Lego Blocks (and yes, I did punch out all of the circled by hand with my trusty eyelet punch and glued each one on by hand…can you tell I like this kid!!??). I actually has a pretty funny experience as I was trying to sort out the design – I did a quick search online to try to find the dimensions of a Lego brick, and was surprised to see how seriously Lego fans take their measurements. I actually has to call on the help of one of my scrappy friends (thanks Jasmine), to sort through the lingo and get me what I needed! Was it worth it – you tell me????!!!

This was the first one I ever attempted - at 50th birthday card for my Brother-in-law.
It is incredibly easy to make, and so much fun to watch as the recipient tries to figure it out! Although I have seen a few tutorials online for how to create a 6″x6″ card, I wanted one that would fit into a standard A2 envelope. When finished, this little one measures 4 1/4″X 5 1/2″ – envelope friendly!!!!
You can create one too – here’s how:
Materials:
- 2 pieces of cardstock cut to 4 1/4″ X 5 1/2″.
- Adhesive
Yup – that’s it, besides all the beautiful paper and embellishments you will add. Just remember that each face folds back on the next, so bulky embellishments will not work very well on this type of card.
Step 1

Cut two pieces of cardstock to 4 1/4″ X 5 1/2″. It is important to be precise in your cutting as the card will not work properly if the pieces do not line up.
Step 2

Place one piece of your cardstock down on a scoring board with the 4 1/4″ side across the top. Score at 1 1/16″. Turn your paper 180 degrees and score 1 1/16″ from the opposite edge.
Step 3

The piece is cut in half through both score lines.
Turn your paper 90 degrees (now the 5 1/2″ side is along the top), and cut the piece of cardstock in half at the 2 3/4″ line. Put these two pieces aside.
Step 4

Using your second piece, place it on your scoring board with the 5 1/2″ side along the top. Note – this is the opposite of what you did with the first piece in step 2.
Score at the 1 3/8″ line. Turn the paper 180 degrees and score 1 3/8″ from the opposite edge.
Turn your paper 90 degrees (now the 4 1/4″ side is along the top), and cut the piece of cardstock in half.
Step 5

Fold all your score lines and then take the first two pieces you cut and line them back up. You will notice that the 4 1/4″ side is along the top, the score lines run vertical and the cut line runs horizontal.
Apply adhesive to the bottom 1″ or so of each corner from the outer edge to the first score line. Be generous – this is the only spot that you will use glue, so it will be the only thing holding the card together.
Step 6

Place the second two pieces over top of the bottom pieces and firmly press down on the adhesive. It is very important to be precise when lining up the pieces. Make sure your score lines line up. For these pieces, you will note that the 4 1/4″ edge is still the top edge, but this time, the score lines run horizontal and the cut line runs vertical.
Step 7

Carefully open the card by pulling the middle cutline open and back on itself and the press down on all of your fold lines. Continue this process with all faces until you return back to the beginning. Embellish!
So, there you have a it – “This is the card that never ends. Yes it goes on and on my friends…” (this song has been in my head all day)!
And now for a little giveaway! Do remember the little “guess the number of jelly beans” jars you used to play as a child? Well, I have one for you today too! Except, instead of jellybeans, I want to see if you can figure out how many circles I punched and glued onto the Lego card to make the “studs” (I initially called them prongs, but my scrappy friend Jasmine informed me that the technical word is “stud” – who knew???). What the price for the first person who guesses correctly, or the closest person to guess by March 30th? A custom made never ending Lego card for someone special in your life. I will consult with you and we can figure out colours and sentiments together. And then, I get to do all the punching and gluing again, and you will get to enjoy giving this one away! Can’t wait to see who wins! Stay tuned, and comment below!

Love this card., but Im a little lost/confused… in step 6- do you cut that piece in half, or leave it whole ( you would have total of 3 or total of 4 pc. of cardstock? ) I only have 4 days to get this card made-yikes-lol. No, not doing the logo one 🙂
Jo, I’m glad you caught this! Back in step 4, there is actually something missing! Do you remember how you turned the first piece of cardstock 90 degrees and cut it down the middle across the score lines? You will need to do the same thing with the second piece in step 4 after you have scored it! Turn it 90 degrees and cut down the middle through the score lines! I will go and change that in the tutorial when I get home today, but I hope that helps for now!!!
thank you for answering me- hope mine turns out half as nice as your 2 .